
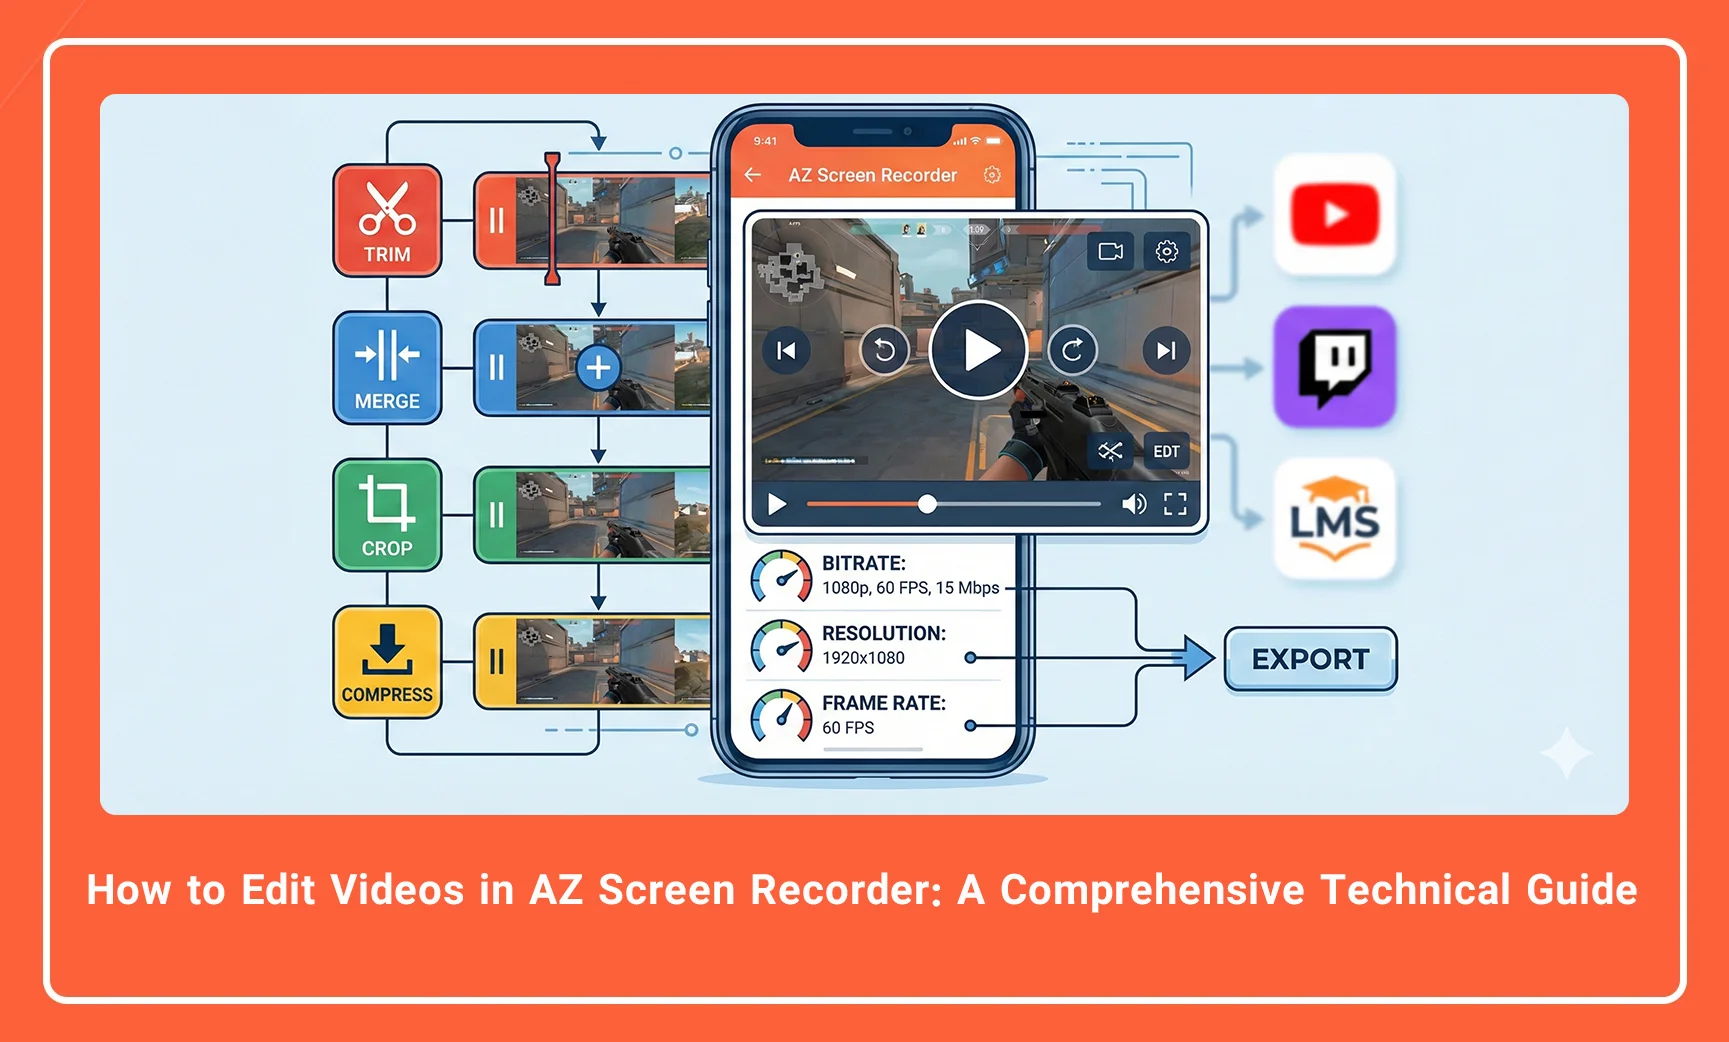
How to Edit Videos in AZ Screen Recorder: A Comprehensive Technical Guide
In the domain of mobile content creation, high-fidelity screen capture is only the initial phase of production. To produce professional-grade content suitable for platforms like YouTube, Twitch, or educational Learning Management Systems (LMS), raw footage requires precise post-production. While desktop Non-Linear Editing (NLE) systems offer robust power, they often disrupt the mobile workflow.
AZ Screen Recorder distinguishes itself not merely as a capture utility, but as an integrated mobile production suite. Its built-in video editor allows users to execute essential edits—trimming, merging, cropping, and compressing—without offloading data to a workstation. This guide provides a deep technical analysis of the editing capabilities within AZ Screen Recorder, ensuring your final output maintains optimal bitrate, resolution, and frame rate integrity.
Accessing the Built-in Editor Interface
Before manipulating video data, one must understand the entry points to the editing suite. AZ Screen Recorder integrates its editor directly into the file management system, minimizing latency between capture and edit.
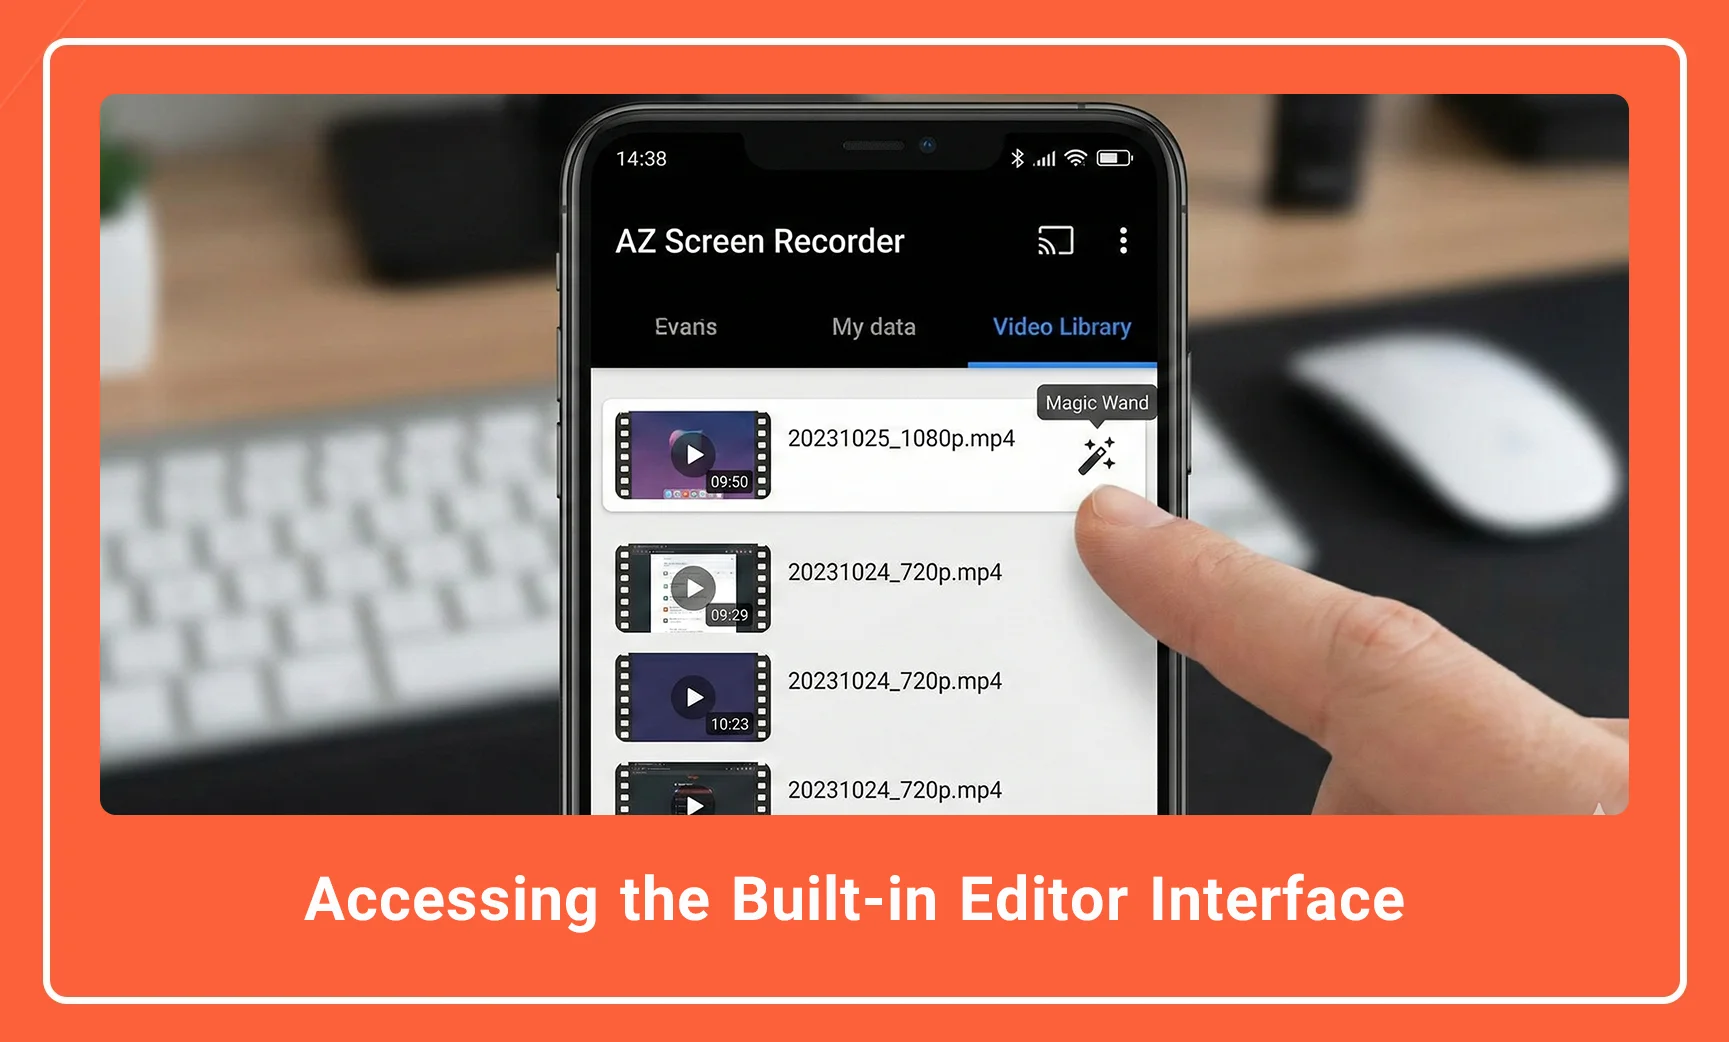
To access the editor, navigate to the Video Library tab within the application interface. Locate the specific recording file, typically identified by its timestamp and resolution (e.g., 20231025_1080p.mp4). Select the “Magic Wand” icon associated with the file. This action loads the video into the editing buffer.
Description: A screenshot of the AZ Screen Recorder “Videos” tab, highlighting the specific video file list with a red circle around the “Magic Wand” (Edit) icon next to a recorded clip.
Alt Text: Accessing the edit menu in AZ Screen Recorder interface via the magic wand icon.
Precision Trimming and Cutting
The fundamental operation in any video workflow is the removal of extraneous footage. In mobile screen recording, this often involves removing the setup phase (starting the recording) or the termination phase (stopping the recording).
AZ Screen Recorder processes video trimming by altering the In-Point and Out-Point timestamps without necessarily re-encoding the entire stream, depending on the modification depth.
Step-by-Step: Trimming Video Segments
-
Launch the Trim Tool: Select the “Trim” icon from the bottom toolbar.
-
Adjust the Timeline: You will be presented with a linear video timeline. Drag the left handle to set the new In-Point (start time).
-
Set the Out-Point: Drag the right handle to set the new Out-Point (end time).
-
Cut the Middle (Optional): If your objective is to remove a segment from the center (e.g., a loading screen or a technical error), switch to the “Cut Middle” mode. Select the start and end of the unwanted section.
-
Preview: Always verify the cut by playing the segment before finalization.
It is critical to note that precise trimming ensures the viewer’s engagement is not lost during static or irrelevant screen time.
Description: A close-up view of the Trimming interface showing the timeline bar with left and right selection handles, and the “Trim” vs “Cut Middle” toggle options clearly visible.
Alt Text: Trimming timeline interface in AZ Screen Recorder showing selection handles.
Merging Clips and Resolution Consistency
For tutorials or gameplay highlights involving multiple sessions, the Merge Videos function is essential. This feature allows the concatenation of distinct video files into a single MP4 container.
Technical Consideration: Resolution Mismatch
When merging videos, technical uniformity is paramount. If you attempt to merge a 720p clip with a 1080p clip, the rendering engine must conform the videos to a single resolution standard. This often results in upscaling artifacts (pixelation) or downscaling loss.
Best Practice: Ensure all source clips are recorded with identical Resolution (e.g., 1920×1080) and Frame Rate (e.g., 60 FPS) settings prior to merging.
How to Merge:
-
Select “Merge Videos” from the main editing menu.
-
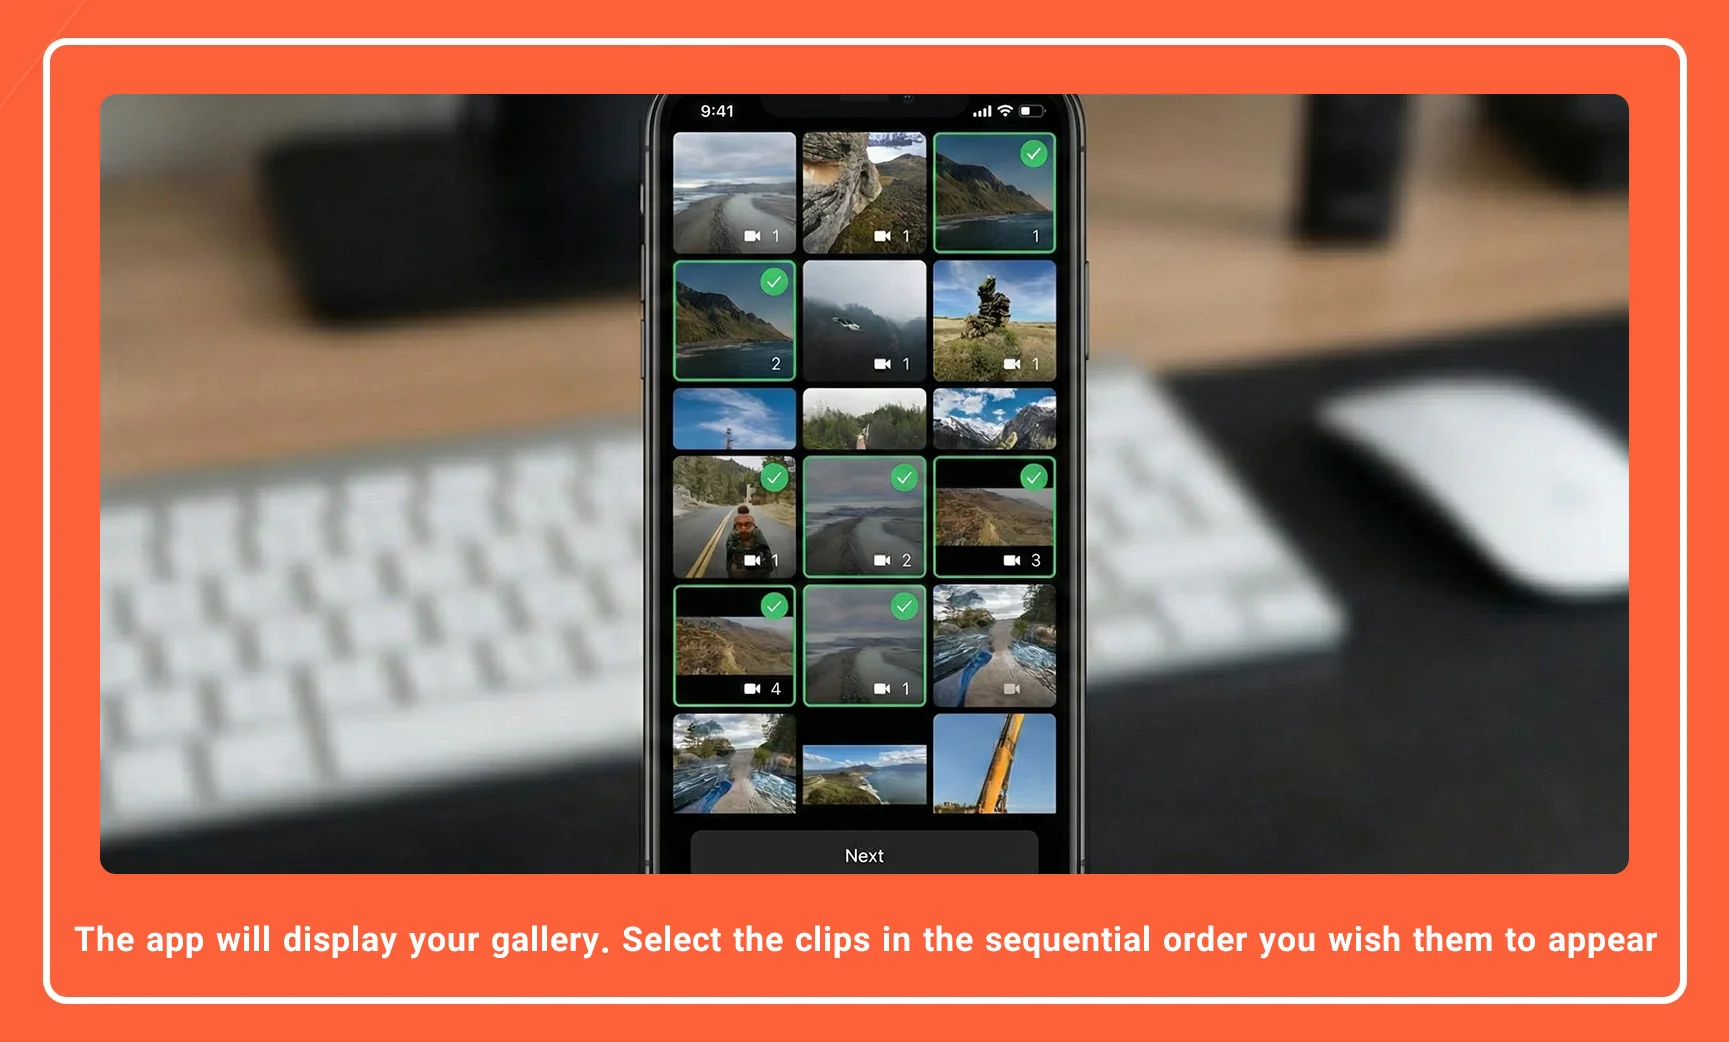
The app will display your gallery. Select the clips in the sequential order you wish them to appear
-
Arrange the sequence if necessary by dragging the clips in the queue.
-
Tap “Save” to initiate the concatenation process.
Description: The “Merge Videos” selection screen showing multiple video thumbnails selected with numbers (1, 2, 3) indicating the merge order.
Alt Text: Selecting multiple clips to merge in AZ Screen Recorder video editor.
Cropping and Aspect Ratio Adjustment
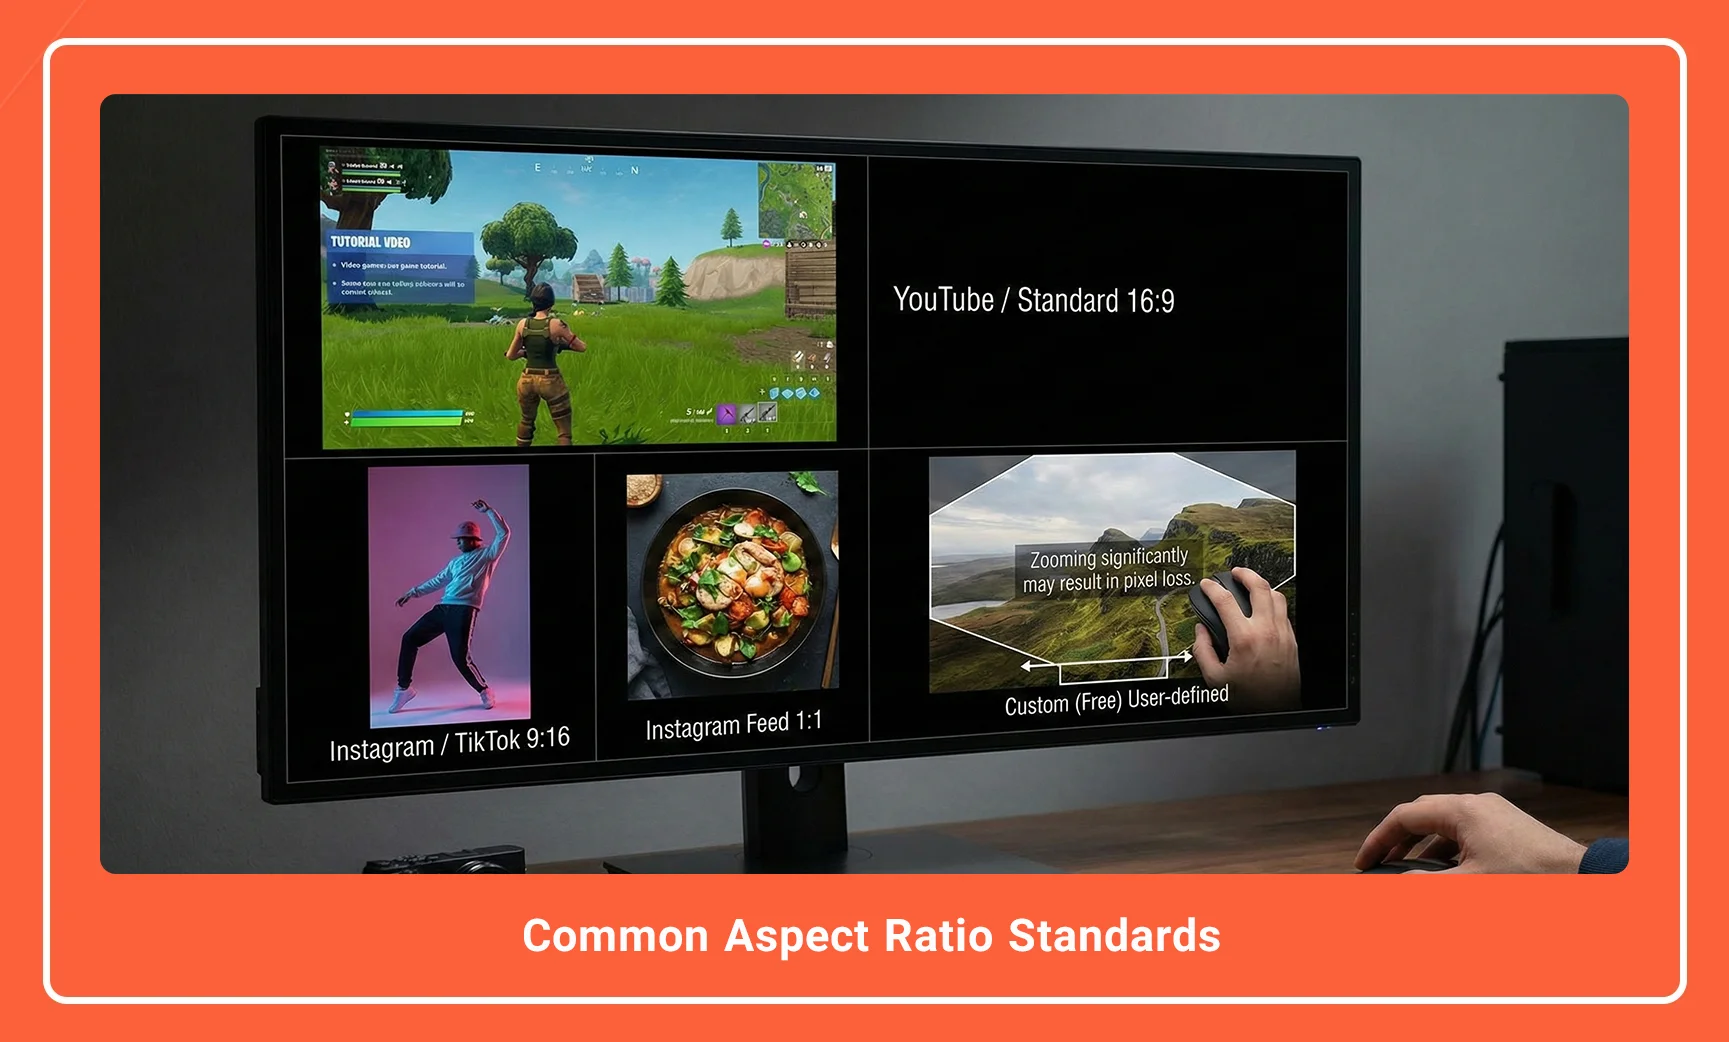
Content platforms enforce strict aspect ratio standards. While YouTube utilizes the standard widescreen 16:9, platforms like TikTok or YouTube Shorts require a vertical 9:16 format. The Crop tool allows you to reframe your footage to meet these specifications.
Common Aspect Ratio Standards
| Platform / Use Case | Aspect Ratio | Technical Description |
| YouTube / Standard | 16:9 | Landscape. Best for gameplay and desktop tutorials. |
| Instagram / TikTok | 9:16 | Vertical. Ideal for mobile-first viewing. |
| Instagram Feed | 1:1 | Square. Legacy format for social feeds. |
| Custom | Free | User-defined dimensions based on specific pixel counts. |
When cropping, be aware that you are discarding pixel data. Zooming in significantly on a 1080p recording to create a 1:1 square may result in a loss of sharpness.
Description: The Crop tool interface showing a grid overlay on a gameplay video, with options at the bottom for different aspect ratios (Free, 1:1, 16:9, 9:16).
Alt Text: Cropping video aspect ratio tool in AZ Screen Recorder for social media formats.
Video Compression: Balancing Quality and Size
High-bitrate recordings (e.g., 12 Mbps) produce large files that are difficult to upload or share. AZ Screen Recorder includes a Compress Video utility that utilizes transcoding algorithms to reduce file size.
This process involves lowering the bitrate or resolution. It is a destructive process; therefore, it is advisable to keep a copy of the original master file.
Compression Strategy:
-
For YouTube: Maintain high resolution (1080p) and moderate bitrate.
-
For WhatsApp/Discord: Aggressively compress resolution to 720p or lower to meet file size limits (e.g., <100MB).
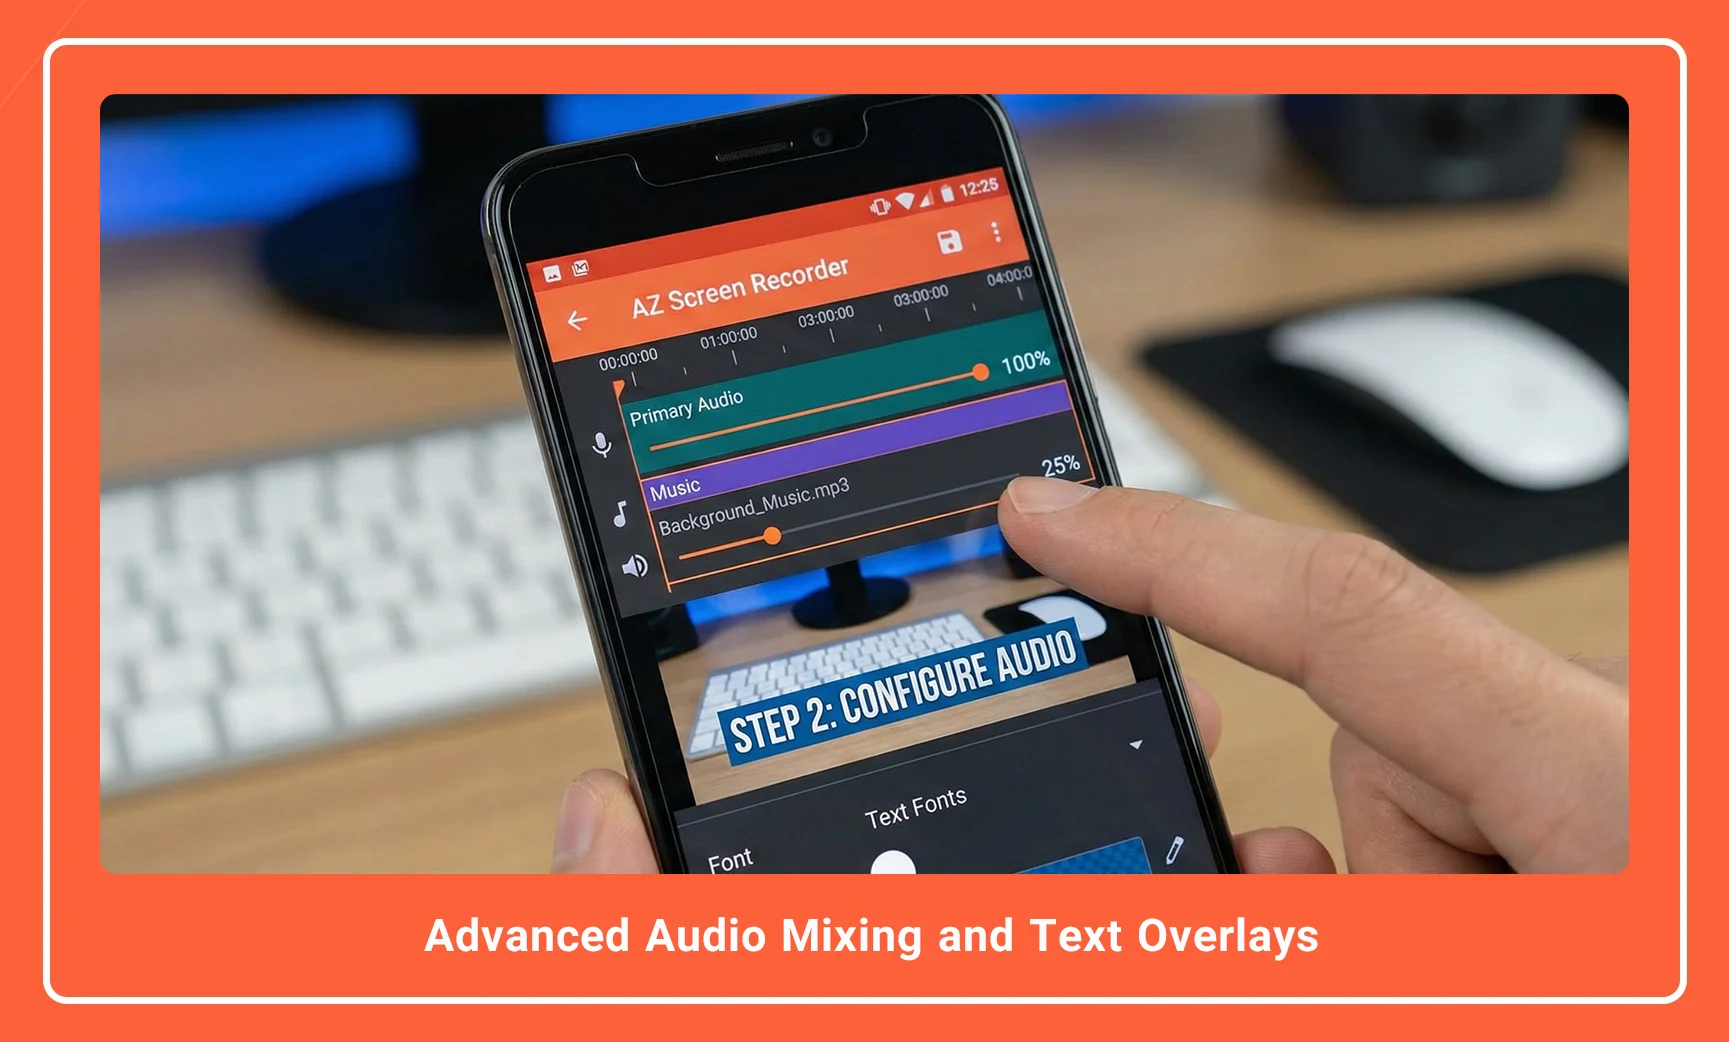
Advanced Audio Mixing and Text Overlays
Visuals are only half the equation. The editor allows for the addition of external audio tracks and text elements to enhance the narrative.
Audio Post-Production
The “Add Music” feature allows you to layer a secondary audio track over the original internal audio or microphone commentary.
-
Volume Balancing: You can adjust the gain of the original audio versus the added music. For background music, it is recommended to set the volume to 20-30% to ensure it does not overpower the voiceover.
Text and Subtitles
Adding text is crucial for context, especially if the video is viewed without sound. You can customize the font, color, and background of the text overlay, as well as its duration on the timeline.
Description: The “Add Text” interface showing a text box overlay on the video, with a color palette selector and font size slider at the bottom.
Alt Text: Adding text overlays and subtitles in AZ Screen Recorder editor.
Converting to GIF and Frame Extraction
For creating short, looping previews or thumbnails, AZ Screen Recorder offers specialized export tools.
-
GIF Converter: This converts a selected video segment into the GIF format. This removes the audio track and significantly lowers the color depth to 256 colors, suitable for quick sharing on forums or social media comments.
-
Extract Frames: This feature allows you to select a specific frame and save it as a high-resolution JPG or PNG image, which is ideal for creating YouTube thumbnails.
Conclusion
AZ Screen Recorder transcends the definition of a simple capture tool by offering a robust, integrated video editing suite. By mastering these post-production features—specifically precise trimming, resolution-matched merging, and format-specific cropping—content creators can produce polished, professional videos directly from their mobile devices.
Whether you are compressing a tutorial for quick sharing or stitching together a montage of gameplay highlights, the efficient use of these tools eliminates the need for cumbersome desktop software transfer.
Next Step: Open your AZ Screen Recorder gallery today, select a recent raw recording, and practice trimming the start and end points to create a seamless 30-second clip ready for publication.
Frequently Asked Questions
1. Does editing a video in AZ Screen Recorder reduce its quality?
Generally, simple trimming does not reduce quality. However, utilizing the “Compress” feature or heavily cropping the video will require re-encoding, which may result in a slight loss of fidelity depending on the settings chosen.
2. Can I merge videos with different resolutions?
Yes, but it is not recommended. The editor will force the clips to conform to a single resolution, which typically results in blurring or pixelation of the lower-resolution clips.
3. Is it possible to remove the AZ Screen Recorder watermark during editing?
Yes, the watermark can usually be removed via the settings menu or by upgrading to the Pro/Premium version of the application, which allows for a clean, professional output.
4. What file formats does the editor support for export?
The editor primarily exports videos in the MP4 container, which is the industry standard for mobile compatibility and web streaming. It also supports exporting short clips as GIF files.
5. Can I add my own music files to the video?
Yes, the “Add Audio” or “Background Music” feature allows you to import local audio files (MP3, WAV) from your device storage to layer over your screen recording.
AZ Screen Recorder is one of the most popular and powerful free and professional applications for screen recording on Android devices. Due to its ease of use, high output quality, and a rich set of features, this application has become a standard tool for gamers, educational content creators, and general users.